So, you want to make a point and click system?
Last summer, I made a puzzle game for a game jam with a couple of friends of mine. In our game, the player moved around a floating world by clicking on the environment to move there. Depending on what they clicked, they could interact with the certain objects, pick them up, examine them, and more. Due to the nature of game jams, the game worked, but was very poorly written. However, this week, almost 8 months later, I have revisited the code I wrote then and made it more accessible and easily digestable so that anyone can use it! So stick around if this interests you, and let’s get developing!

Where do we start?
For this project, I’m working with the Universal Render Pipeline in Unity 2020.1.2f1. You do not need to work in URP if you don’t want to, HDRP or the older render pipelines supplied by Unity work just as fine. The version of Unity you use does not matter either (to a certain degree of course!) as I’m not using any fancy new features in the 2020 version of Unity except for aesthetical reasons, such as with VFX graph and ProBuilder. As long as you’re using a version of Unity that is recent, everything should still be applicable. In my project I also use the DOTween package to add some animation to my project through script. You can get DOTween here!
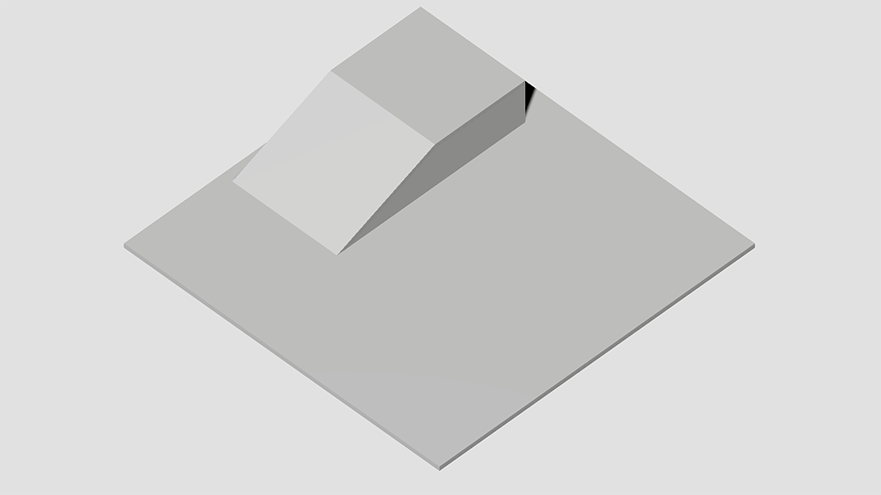
The best place to start off would be to create a simple environment. This could be made however you want: by importing a level you’ve created in a 3D modelling software of your choosing, by creating a level using ProBuilder or some other level creation tool, or simply by creating a simple cube and rescaling it to the right size. For my version, I opted to create my level environment in ProBuilder. It is easy and quick, and gives pretty good results. Regardless of how you do this, you don’t need to worry about what components you need and what settings you should use. The three things that matter for this is that the level is marked as navigation static and that it has a MeshRenderer and a MeshFilter. These are needed as NavMesh is calculated based on geometry rather than physics. You should however add the most appropriate collider to your level as this will be needed when raycasting later!
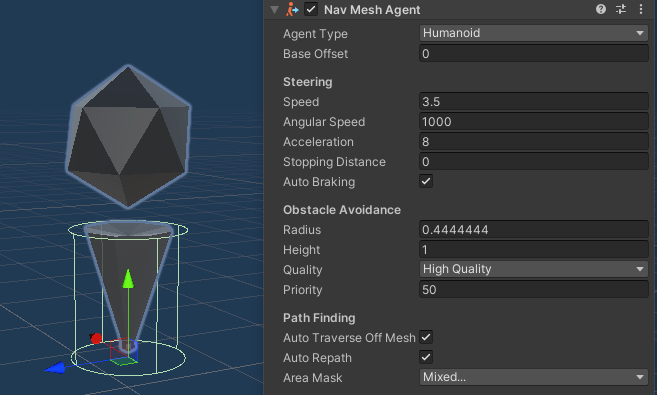
Next up, the player. Again, you may choose to do the player however you want, but there are some things that are required here component wise. First, this player object needs a NavMeshAgent component attached to it. This component can be found under Navigation > NavMeshAgent. To feel good in the player’s hands, I set the player speed to 3.5 and the angular speed to 1000. The angular speed here is for how quickly the agent rotates, and a higher number makes the agent more responsive when moving. I also made the radius fit around the agent’s body as snug as possible. For further context on how I set up my NavMeshAgent, see the image below.
With the setup done, we can start coding!
The Singleton Pattern
Contrary to how you might have thought, we’re not putting the movement on the player, but rather a manager object. Start by creating a new empty game object and add a new script to it called ClickMovement. We’re going to return to this script soon, but first we need to set up a Singleton pattern.
To quote TutorialsPoint.com:
”[A Singleton pattern] involves a single class which is responsible to create an object while making sure that only single object gets created. This class provides a way to access its only object which can be accessed directly without need to instantiate the object of the class.”
It is similar to a static class, but unlike a static class the Singleton has an instance existing in the game that can be accessed at any time. By doing this, we won’t need to add the local manager to any component that calls for it everytime we want to use it.
To start, we’ll create a standard MonoBehaviour script. This is so that we can still put the script on an object as a component. Remove both the Start() and Update() function as they are not needed in this pattern.
Here’s where we’ll change it up a bit. Make the class an abstract class. This means that this MonoBehaviour script we’re doing will act more as a framework than anything else. You cannot instantiate it, and each and every class that will inherit from it will get it’s variables. We then want to turn this class into a generic class. This means that the pattern can be used for any object we may want it to work on and won’t be limited to only certain scripts.
Your script should look like this by now:
using UnityEngine;

public abstract class Singleton<T> : MonoBehaviour where T : MonoBehaviour
{

}
Next, we’re going to implement the instance variables. We will make two of these variables: one private and one public. The private variable is easy to setup. It should be a private and static variable of type ‘T’. Why T? T is the type of class that will inherit from this script. Call this variable _instance.
For the public variable, we’re actually making a property. Similar to how we did for the private variable, make the public property static and of type T, and call it Instance. Within the curly brackets we only want a getter, and we will only get it if there is an _instance present. If there isn’t an _instance present in the scene yet we create a new GameObject, add a component of type T to it, and assign this object to the _instance variable. This object should also be marked to not be destroyed on load, to make it present in each and every scene. With a new _instance available, we simply return the private variable if the public property is attempted to be used.
Your script should look like this by now:
using UnityEngine;

public abstract class Singleton<T> : MonoBehaviour where T : MonoBehaviour
{
    private static T _instance;
    public static T Instance
    {
        get
        {
            if (_instance == null)
            {
                _instance = new GameObject(typeof(T).ToString()).AddComponent<T>();
                DontDestroyOnLoad(_instance.gameObject);
            }
            return _instance;
        }
    }
}
…and that’s basically the script! All we need to do now is make sure that there is only one of these objects available in the scene at a time. This can pretty easily be done by adding some logic to run in the Awake() function. There are two things we wanna check against when making sure that there is only one object available. First, is the _instance variable not null? If it isn’t, we also want to check if the _instance variable is this? If not, then we destroy this object. If either of these conditions are met, such as _instance being null, or that _instance is the object we’re working on, we want to just make sure that it is properly set. Additionally, we can make it so that if the object this script is currently on is the _instance and it is in the process of being destroyed, the _instance variable is set to null.
Did you get all that? If not, or if you want to check your work, here’s how the script should look like:
using UnityEngine;

public abstract class Singleton<T> : MonoBehaviour where T : MonoBehaviour
{
    private static T _instance;

    public static T Instance
    {
        get
        {
            if (_instance == null)
            {
                _instance = new GameObject(typeof(T).ToString()).AddComponent<T>();

                DontDestroyOnLoad(_instance.gameObject);
            }
            return _instance;
        }
    }

    void Awake()
    {
        if(_instance != null && _instance != this)
        {
            Destroy(gameObject);
        }
        else
        {
            _instance = GetComponent<T>();
        }
    }

    void OnDestroy()
    {
        if (_instance == this)
        {
            _instance = null;
        }
    }
}
Boom! Singleton pattern done!
The ‘Click’ Manager
With the Singleton pattern done, we can go back to working on our ClickMovement manager. First things first, we need to update the script’s inheritance. Instead of having the script derive from MonoBehaviour, have it derive from Singleton<ClickMovement>. This utilises our new pattern and substitutes the ‘T’ from earlier with ClickMovement whenever we call for it.
For this manager’s variables, we only need two. We need a reference to our Player class (we’ll get to that later) and to the last point we hit in the environment, in the form of a RaycastHit variable. We can remove the Start() function entirely, but we keep the Update() function. In the Update() function, you need only to set your lastPointHit variable to be set in a new function we’ll make later called MoveToPoint().
By now your script should be riddled with errors, but do not worry. It should also look like this:
using UnityEngine;

public class ClickMovement : Singleton<ClickMovement>
{
    public Player player;
    public RaycastHit lastPointHit;

    void Update()
    {
        lastPointHit = MoveToPoint();
    }
}
Let’s fix some errors, shall we? First, let’s focus on the MoveToPoint() function that sets our last point hit. Create a private function that returns the RaycastHit type. The first thing we’ll do is have the function return with lastPointHit. As this is being called every frame in the Update() function and needs a return type, we don’t want this to return null or similar, as that will completely break the function. However, we want this to change if the player clicks somewhere with their left mouse button. Make an if-statement and check for this, and within this condition add two local variables. First, add a new RaycastHit and just call it hit. Second, we need a ray for the raycasting we’ll do. Create a Ray and assign to it by calling on the main camera’s ScreenPointToRay function, and supply the mouse position.
Your script should now look like this:
using UnityEngine;

public class ClickMovement : Singleton<ClickMovement>
{
    public Player player;
    public RaycastHit lastPointHit;

    void Update()
    {
        lastPointHit = MoveToPoint();
    }

    RaycastHit MoveToPoint()
    {
        if (Input.GetMouseButtonDown(0))
        {
            RaycastHit hit;
            Ray ray = Camera.main.ScreenPointToRay(Input.mousePosition);
        }
        return lastPointHit;
    }
}
Finally, let’s throw a raycast! Very simply use the local Ray and RaycastHit variables you just created and put them in an if-statement. If the ray connects with anything, the RaycastHit variable will spit out the collider it connected to. Within this condition, add another if-statement. This time, we want to just make sure that the RaycastHit actually hit something. We’ll also make sure that the player’s NavMeshAgent is enabled so that it can properly move. If both those conditions are met, we set the player NavMeshAgent’s destination variable to the position that the raycast hit. We then return the local hit variable to save this position for future use.
With the ClickMovement script completed, this is how it should look like!
using UnityEngine;

public class ClickMovement : Singleton<ClickMovement>
{
    public Player player;
    public RaycastHit lastPointHit;

    void Update()
    {
        lastPointHit = MoveToPoint();
    }

    RaycastHit MoveToPoint()
    {
        if (Input.GetMouseButtonDown(0))
        {
            RaycastHit hit;
            Ray ray = Camera.main.ScreenPointToRay(Input.mousePosition);

            if (Physics.Raycast(ray, out hit))
            {
                if (hit.collider != null && player.NavAgent.enabled)
                {
                    player.NavAgent.destination = hit.point;
                    return hit;
                }
            }
        }
        return lastPointHit;
    }
}
Now for some final clean-up. We’re still missing a Player class! Not to worry, as this is a very simple class. Just create a standard MonoBehaviour script and set it to have a single property to it. This property should be a public NavMeshAgent property with a getter and a private setter. In the Awake() function, you then set the NavMeshAgent to get the player’s NavMeshAgent component. Should be pretty easy and look like it does below. But why go through the trouble of making a Player class that is just a single property? Well, with this class it should now be easier to keep your code clean if you need to call upon multiple different components that the Player should have. If you don’t want to do this, you can simply substitute the Player class with the NavMeshAgent class.
using UnityEngine;
using UnityEngine.AI;

public class Player : MonoBehaviour
{
    public NavMeshAgent NavAgent { get; private set; }

    void Awake()
    {
        NavAgent = GetComponent<NavMeshAgent>();
    }
}
…and presto! If you now assign the player to the manager you made earlier, and bake the NavMesh if you haven’t done so yet, the player should be able to move around the environment you’ve made. Feel free to play around with the variables used in the NavMeshAgent component to make the player feel as good as possible to play with.

Object Interaction
If you want to you can end here, but the system we used when making Brockhampton had some additional functionality that all ties back to object interaction. For the rest of this tutorial, we’ll create two types of interaction scripts. The first one will be on a standard action where the player acts on the object, and the object reacts. The second one will be a simple variation that allows for dependencies between actions.
Let’s create a new script and call it ClickInteraction. This script will be an abstract class, similar to how we did with the Singleton class earlier. We’re making this class abstract as we want this class to act as a framework for the actual interactions that will be created throughout your project. For this abstract class we can remove the Start() function. We only need to create one variable: a float that will be used to check if the player is within range to use the object. The float can be public to be easily accessible in the Unity inspector. Finally, add an abstract function called Action(). It should be of return type void and take no parameters. This function will be what’s called whenever the player interacts with the object.
By now, your script should look like this:
using UnityEngine;

public abstract class ClickInteraction : MonoBehaviour
{
    public float checkRadius = 2f;

    void Update()
    {

    }

    public abstract void Action();
}
We want the action to take place whenever the player interacts with the object, and therefore the rest of our code will be written in the Update() function. For the action to take place, the player needs to meet a couple of conditions. First, we want the player to be within range of the object. We can find out if the player is within range by checking if the distance between the object and the player is less than or equal to our checkRadius. To get the centre of the object, I’m using the object’s collider as one will be needed if the object is to be interactable. By getting the bounds of this collider, the centre can be accessed and gives a good point to calculate the distance from.
Another condition that will be needed for this if-statement is to make sure that the collider hit in the ClickMovement script is actually the object we want to interact with. By utilising our Singleton pattern, we can access the lastPointHit variable which saves the collider it hit. If that collider matches the one on this object, that’s another condition passed.
With the conditions set, we can write what will happen when it’s met. To make sure that the action isn’t called every frame when the player is within range, we set the lastPointHit variable to simply be a new RaycastHit(). Then, we call the Action() function.
…and done! Again, here’s a cheat sheet if any instruction was unclear:
using UnityEngine;

public abstract class ClickInteraction : MonoBehaviour
{
    public float checkRadius = 2f;

    void Update()
    {
        if (Vector3.Distance(GetComponent<Collider>().bounds.center, ClickMovement.Instance.player.transform.position) <= checkRadius && ClickMovement.Instance.lastPointHit.collider == GetComponent<Collider>())
        {
            ClickMovement.Instance.lastPointHit = new RaycastHit();
            Action();
        }
    }

    public abstract void Action();
}
So, how do you use this script? If you recall, this script is abstract, meaning that you instantiate it and thusly it cannot be used as a component. Instead, if you want to create an interaction script, you make another script that inherits from this script. As this can be used however you please, I will only use an example rather than give you a tutorial here. Have a look at how I used this method to speed up the animation on an object once I interacted with it:
using DG.Tweening;
using UnityEngine;

public class AnimateFaster : ClickInteraction
{
    [Header("Custom Interaction Variables")]
    public Animator animator;
    public float speedIncrease = 2;

    public override void Action()
    {
        DOTween.To(() => animator.speed, x => animator.speed = x, speedIncrease, 1);
    }
}
Object Interaction (with Dependencies)
To prepare our project for dependency interaction, we need to make some small amendments to our ClickInteraction script. This is as our dependency script will (funnily enough) depend on it. There are two things we truly need to change to get this to work. Simplest first, we simply change the Update() function to be protected rather than private. This is as the dependency script will need to overwrite the main script’s Update() function to get everything to work properly. Second amendment is to add a new property. This will be a public bool with a getter and a protected setter, and will be used in the dependency script to make sure that the object it is depending on has been interacted with.
Our new ClickInteraction script should look like this:
using UnityEngine;

public abstract class ClickInteraction : MonoBehaviour
{
    public float checkRadius = 2f;
    public bool DependencyMet { get; protected set; }

    protected void Update()
    {
        if (Vector3.Distance(GetComponent<Collider>().bounds.center, ClickMovement.Instance.player.transform.position) <= checkRadius && ClickMovement.Instance.lastPointHit.collider == GetComponent<Collider>())
        {
            ClickMovement.Instance.lastPointHit = new RaycastHit();
            Action();
        }
    }

    public abstract void Action();
}
With that done, we can now create our ClickInteractionWithDependency script (it is quite a mouthful, so if you feel like shorter names work better, feel free to call it whatever you like!) First thing we’ll do is to change the script to inherit from the ClickInteraction script rather than MonoBehaviour. Second, add a public variable of type ClickInteraction and call it something akin to dependencyAction. This will be the interactive object that this object will depend on. The final step is quite simple actually. Copy the Update() function from the ClickInteraction script and change it to be new instead of protected. You also need to surround the Action() call in the Update() function with an if-statement, checking against that new property we made in the ClickInteraction script. If it has been met, the action can be called.
You’re done! If you got anything wrong, here’s the script used:
using UnityEngine;

public abstract class ClickInteractionWithDependency : ClickInteraction
{
    public ClickInteraction dependencyAction;

    new void Update()
    {
        if (Vector3.Distance(GetComponent<Collider>().bounds.center, ClickMovement.Instance.player.transform.position) <= checkRadius && ClickMovement.Instance.lastPointHit.collider == GetComponent<Collider>())
        {
            ClickMovement.Instance.lastPointHit = new RaycastHit();
            if (dependencyAction.DependencyMet)
            {
                Action();
            }
        }
    }
}
As it derives from ClickInteraction, you use this script in the same way. Create small off-shoot classes and call on the Action() function to have the class do something. One thing to keep in mind however is that any object that will now have another object depend on it needs to have it’s DependencyMet property set to true once the action is called. If not, the object depending on it cannot do it’s intended task.
Again, I won’t do a tutorial on how to actually create one of these off-shoot classes, but I’ll give examples. As this needs two examples to work, I’ll label which class is depending on which.
using DG.Tweening;
using UnityEngine;

//AnimateSlower depends on this class
public class AnimateFaster : ClickInteraction
{
    [Header("Custom Interaction Variables")]
    public Animator animator;
    public float speedIncrease = 2;

    public override void Action()
    {
        DOTween.To(() => animator.speed, x => animator.speed = x, speedIncrease, 1);
        DependencyMet = true;
    }
}
using DG.Tweening;
using UnityEngine;

//This class depends on AnimateFaster
public class AnimateSlower : ClickInteractionWithDependency
{
    [Header("Custom Interaction Variables")]
    public Animator animator;
    public float speedDecrease = 0.5f;

    public override void Action()
    {
        DOTween.To(() => animator.speed, x => animator.speed = x, speedDecrease, 1);
	}
}
That’s all! I hope you use this to the best of your abilities! Happy Game Making!